Superior Pathology

Categories
Uncategorized

4 Consequences of Not Labeling Specimens Correctly & How to Avoid Them

How to Collect Tissue Samples for Biomedical Research: 6 Steps

Accurate specimen labeling is a critical component of any healthcare or research setting. It ensures that the correct tests are performed on suitable samples, leading to accurate diagnoses, effective treatments, and reliable research outcomes. However, when specimens are mislabeled, the consequences can be severe and far-reaching, impacting individual patients and the broader scientific research community.

In this blog, we’ll explore 4 significant consequences of incorrect specimen labeling, from the risk of misdiagnosis to the potential for legal and ethical challenges. We’ll also provide practical tips on how to avoid these pitfalls, helping to safeguard the integrity of your work and the results of your analysis.

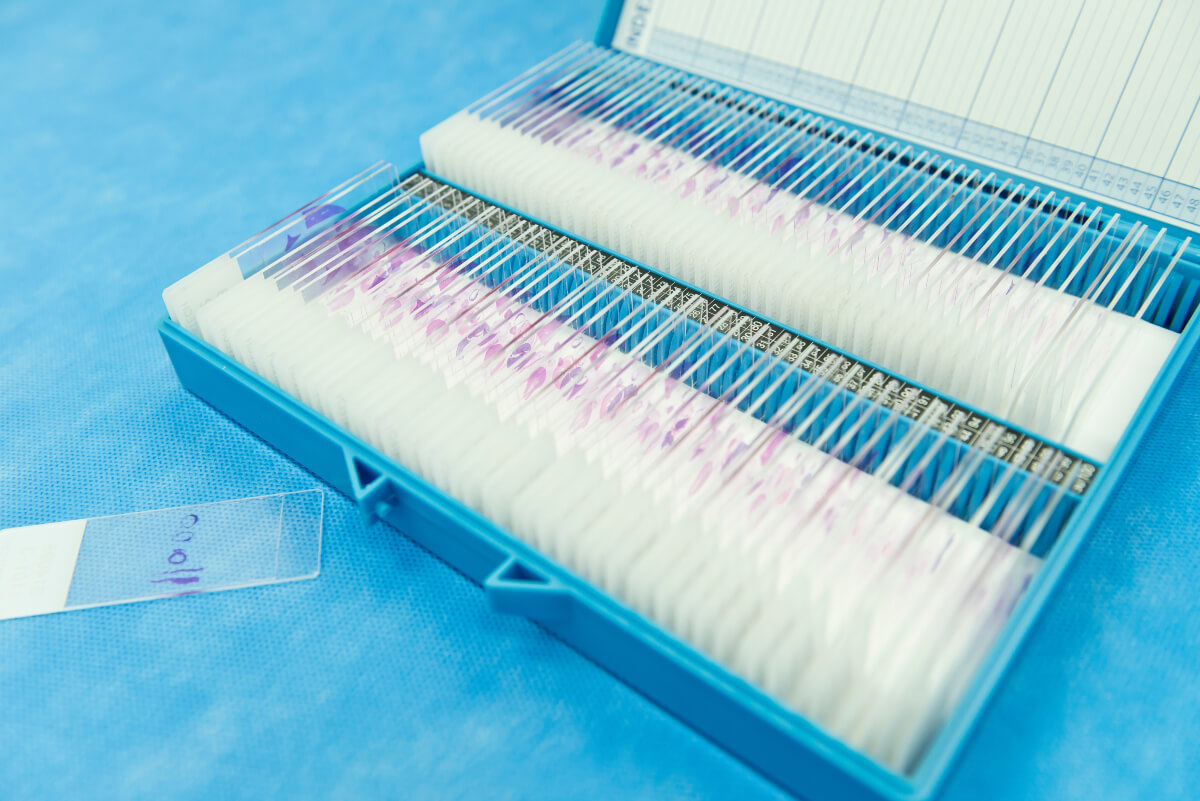
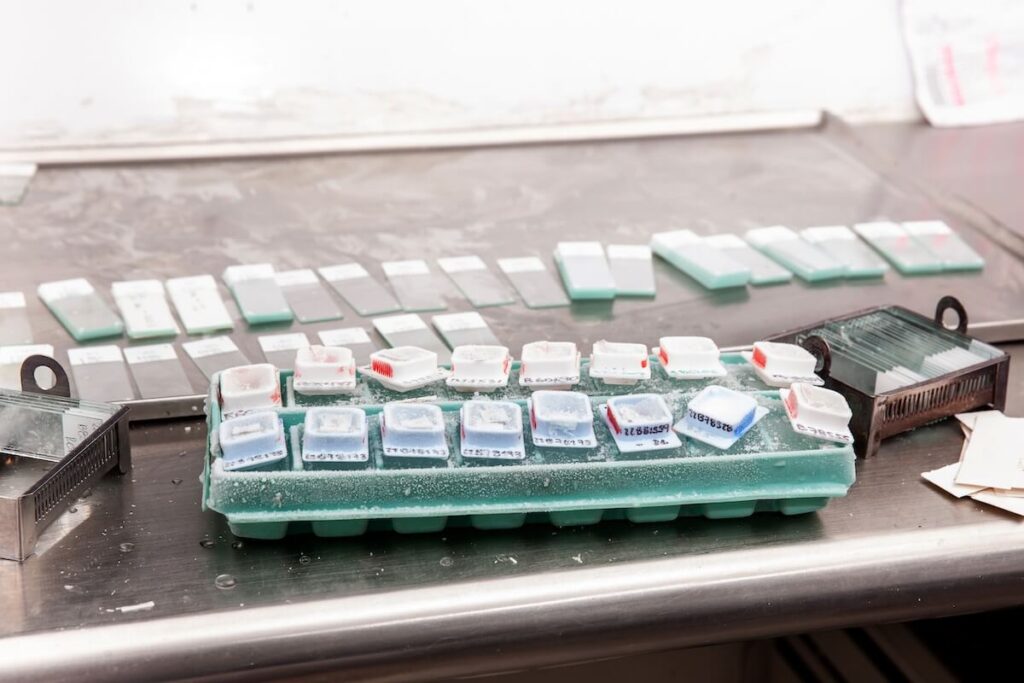
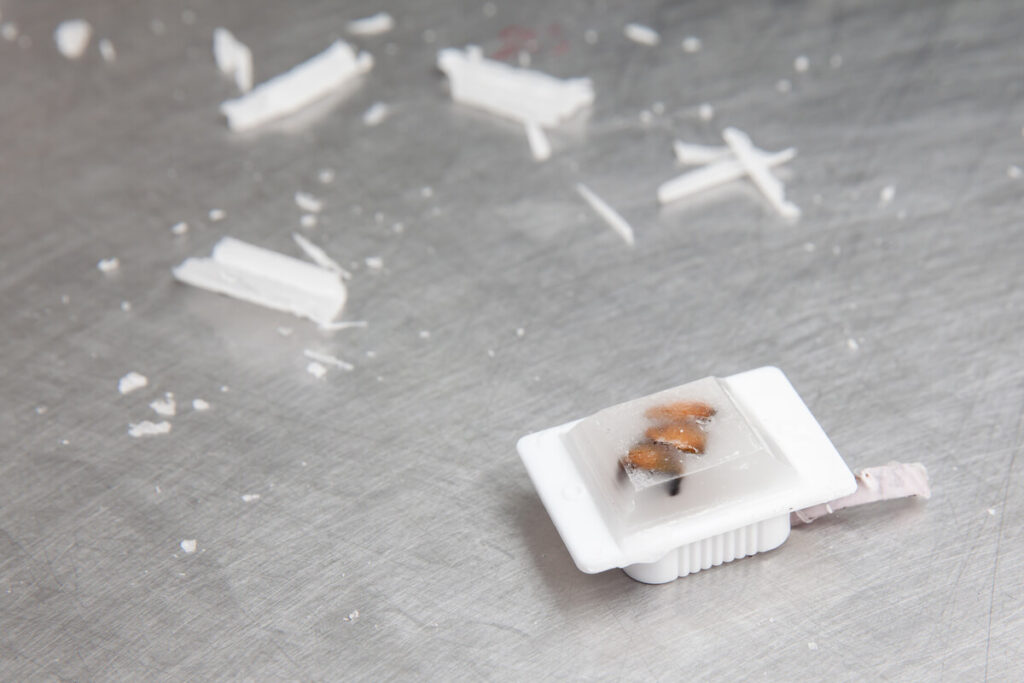
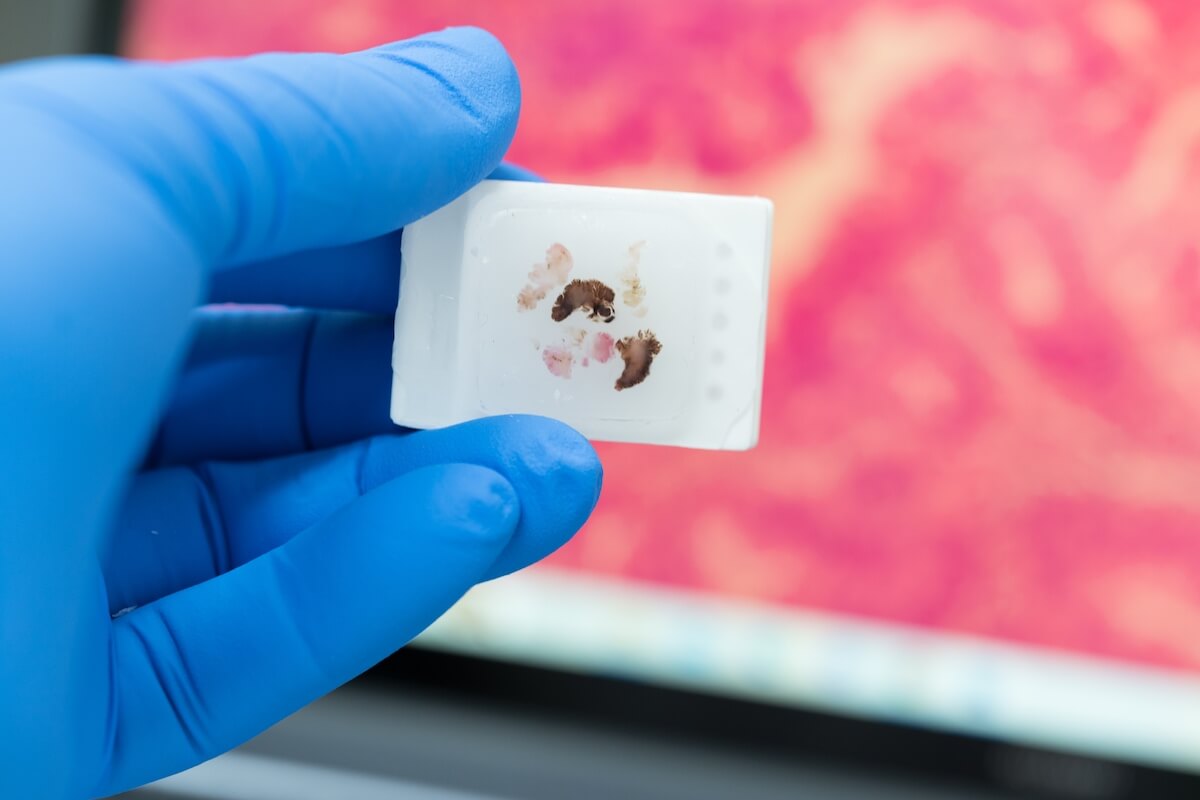
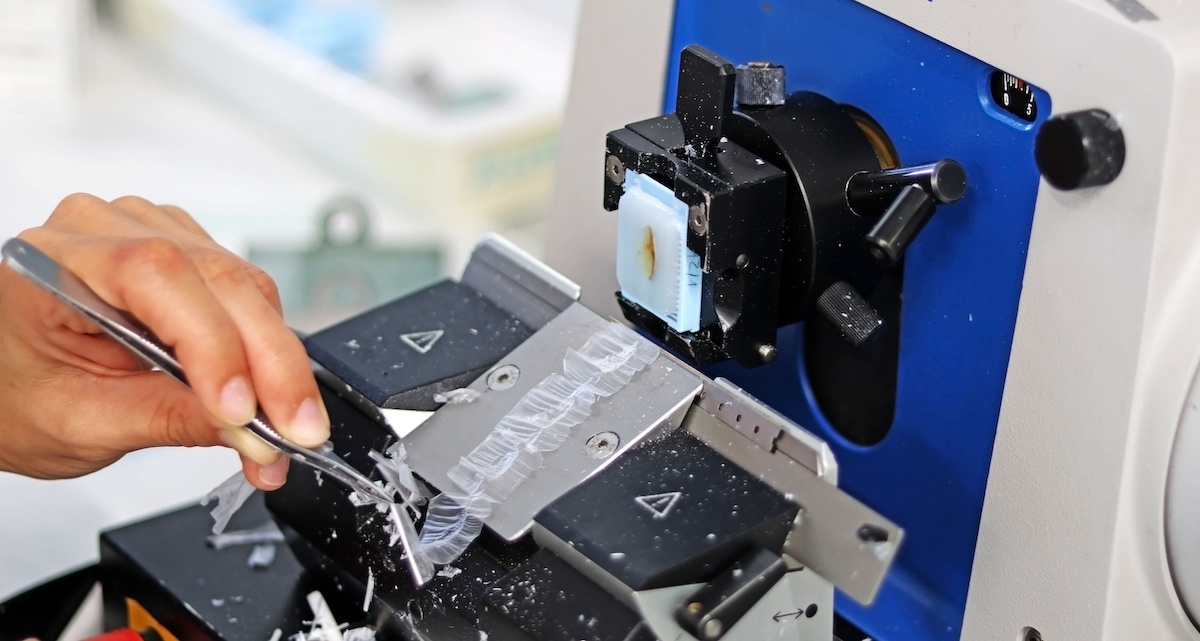
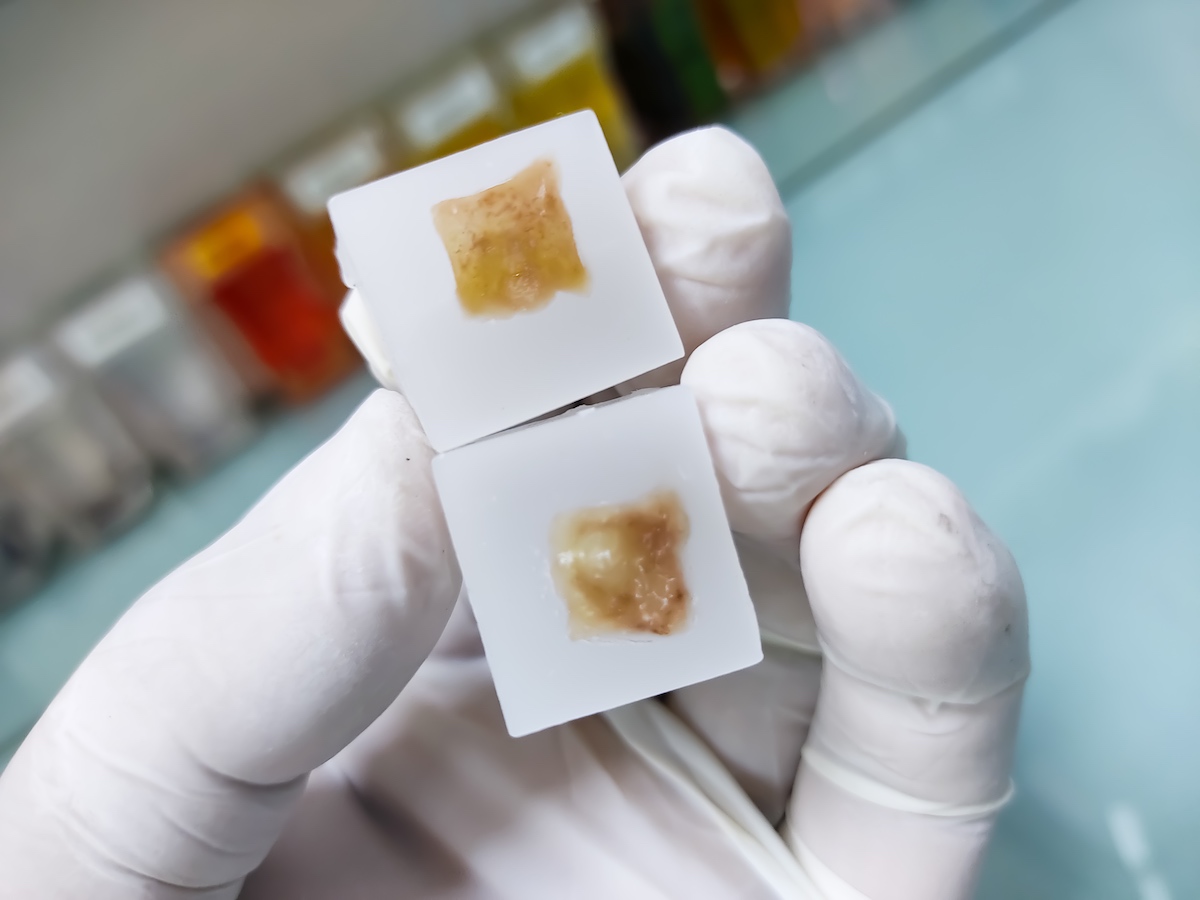
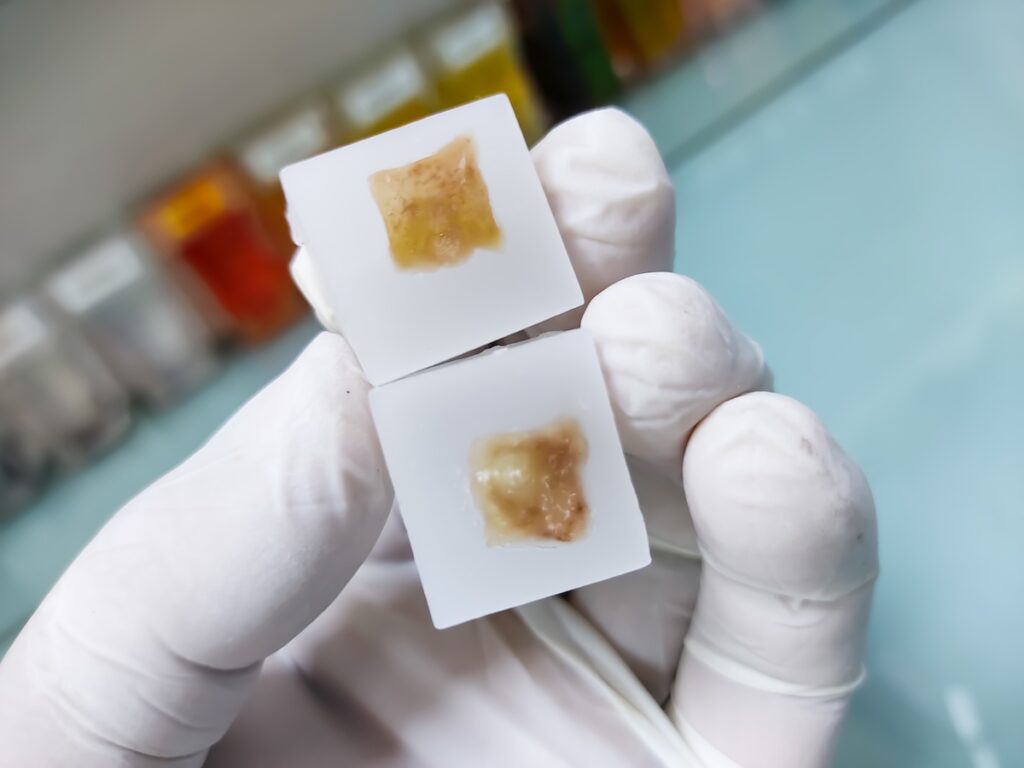
Labeled human tissue histology sample slides

The Importance of Labeling Specimens Correctly

Correctly labeling specimens is the foundation of accurate diagnostics, effective patient care, and successful research analysis. Each specimen represents critical data that inform treatment plans, research outcomes, and differing diagnoses. Even the slightest labeling error can result in misdiagnosis, inappropriate treatment, and failed research results. Additionally, it can result in wasted resources, legal liabilities, and significant ethical concerns. In research settings, incorrect labeling can compromise entire studies, leading to invalid results and lost time. Ensuring specimens are labeled correctly is not just a procedural task—it is crucial in maintaining the integrity and reliability of healthcare and scientific research and practices.

4 Consequences of Incorrect Labeling of Specimens

1. Misdiagnosis or Delayed Diagnosis

The most harmful consequence of false specimen labeling is the risk of a misdiagnosis or delayed diagnosis. With 70% of treatment options determined by lab results, all specimens must be appropriately labeled with the correct patient identification, ensuring every lab result corresponds to the right patient. 

If a specimen is mislabeled, whether with the wrong patient’s information or incorrect details attached, it can lead to potentially life-threatening consequences such as a misdiagnosis. For example, if a breast tissue sample from Patient A is accidentally labeled as belonging to Patient B, the implications can be severe. If Patient B’s results indicate a condition like cancer, the treatment they receive will be radically inappropriate, potentially harmful, or even fatal. Meanwhile, Patient A, who may need urgent medical attention, would not receive the correct diagnosis and treatment. Misdiagnosis can also lead to unnecessary medication prescriptions, surgeries, or therapies. Correcting a misdiagnosis is incredibly time-consuming, leading to worsening symptoms or disease progression of the patient. 

Once a specimen is mislabeled and the error is identified, healthcare providers often need to repeat the test or analysis to obtain accurate results, leading to a delay in diagnosis. A delayed diagnosis can postpone needed treatments, possibly leading to critical delays in life-saving treatments. It’s crucial to avoid mislabeling specimens and ensure patient health and well-being. 

2. Legal and Ethical Issues

Incorrect labeling of specimens can result in legal and ethical issues. Here are a few legal ramifications you can experience if you fail to label specimens correctly: 

Medical Malpractice: Medical malpractice lawsuits are costly and damaging to your reputation. In malpractice lawsuits, patients often seek compensation for incorrect treatment or delayed diagnosis.

Regulatory Penalties: Healthcare facilities must comply with strict rules regarding specimen labeling. If specimens aren’t labeled correctly, you could be fined, lose your accreditation, or, if you own a facility, it could risk permanent closure.

Ethical concerns are another consequence of not labeling specimens correctly: 

Patient Autonomy: Incorrect labeling erodes informed consent since patients may make decisions based on false information, violating their right to autonomy. 

Non-Maleficence: Healthcare providers, researchers, and laboratories have an ethical duty to avoid causing harm. Failing to label specimens correctly could result in inappropriate or delayed treatment, directly harming patients.

Trust & Integrity: Trust is essential in the health and research industries. Unfortunately, incorrect labeling can quickly erode trust and damage the integrity of healthcare professionals, facilities, scientific researchers, and more.

The consequences of legal and ethical issues caused by incorrect labeling highlight the critical need for accuracy and meticulous attention in specimen handling. Don’t risk a damaged reputation or the ill-treatment of patients by failing to label specimens correctly and thoroughly.

3. Damaged Reputation

Repetitive mistakes in specimen labeling can severely affect the reputation of a healthcare facility, researcher, or professional, resulting in a loss of trust among patients, peers, and the medical community as a whole. If errors recur, they signal to outsiders a systemic failure in quality control and raise concerns about the overall reliability of the institution or practitioner. A damaged reputation can lead to decreased patient confidence and an inability to conduct accurate testing, causing a decline in patient numbers, correct research results, and precise scientific discoveries. 

The long-term impact of a damaged reputation can be profound, affecting not only the ability to attract new patients or conduct conclusive testing but also partnerships and funding for further career growth.

4. Negative Impact on Research

False specimen labeling negatively impacts scientific research, potentially skewing results and leading to inaccurate conclusions. Data integrity is crucial in research, as it forms the basis for scientific findings and subsequent recommendations. If specimens are mislabeled, specific samples are associated with incorrect data, distorting the final analysis. For instance, if a mislabeled tissue sample is assumed to belong to a particular demographic or disease group, every finding derived from that specimen will be inaccurate. This results in flawed conclusions that misrepresent the effectiveness of treatments, the progression of diseases, and the identification of biomarkers. 

Moreover, these errors can lead to the publication of false research, which may then be used by other researchers as the basis for additional studies, only adding to the inaccuracies. This ripple effect can be substantial, potentially causing wasted resources, time, money, and effort in the larger scientific community. If research discoveries influence clinical practices or policy decisions, the consequences of incorrect specimen labeling can extend far beyond the laboratory, impacting patient care and public health. In a worst-case scenario, an entire study may need to be revoked, leading to a loss of credibility and reliability in the research institution or scientists involved. 

Tested Strategies to Avoid Incorrect Specimen Labeling

Incorrect specimen labeling no doubt leads to damaging consequences. Here are 3 best practices you can follow for detailed and accurate specimen identification:

  • Implement the barcode systems. Utilizing barcode labeling technologies is a highly effective strategy to reduce human error in specimen labeling. By scanning the barcode, healthcare professionals and researchers can ensure that the correct patient information is linked to the right specimen, minimizing the risk of mistakes and costly errors.
  • Establish standardized labeling protocols. Implementing and strictly adhering to standardized labeling regulations across all departments ensures consistency and accuracy. Detailed, clear-cut guidelines for labeling procedures, including double-checking labels before specimen collection, prevent errors.
  • Practice ongoing staff training. Consistent training sessions for staff on proper labeling techniques and the importance of accurate specimen labeling reinforce best practices. Training also keeps everyone up-to-date with the latest requirements and regulations. Ongoing education helps maintain high standards and significantly reduces the chance of errors due to oversight or unfamiliarity with procedures.

Receive Accurately Labeled FFPE Tissue Samples From Superior BioDiagnostics

Accurate specimen labeling is critical to ensuring the reliability of diagnostic results and the overall success of patient care. As mentioned above, implementing robust systems and protocols can significantly reduce the risk of inaccurate labeling. For laboratories and healthcare providers seeking to maintain the highest standards of accuracy, partnering with reputable suppliers is essential. 

Superior BioDiagnostics provides healthcare professionals, facilities, and researchers with accurately labeled, high-quality FFPE tissue samples. You can trust that each specimen is meticulously handled and precisely labeled, ensuring the integrity of your research or diagnostic processes. Superior BioDiagnostics’ commitment to precision and quality assurance ensures that you can focus on what truly matters—delivering accurate and timely results to support scientific advancement. Our biobank holds normal, malignant, and disease-state FFPE tissue samples collected from various anatomical sites, including breast, cervical, lungs, and more. Contact our biorepository to receive accurately labeled FFPE tissue samples for your research!

Categories
Uncategorized

How to Collect Tissue Samples for Biomedical Research: 6 Steps

How to Collect Tissue Samples for Biomedical Research: 6 Steps

Collecting tissue samples is a crucial process in medical research and diagnostics, requiring precision, expertise, and adherence to best practices to ensure the quality and integrity of the samples. Whether you’re involved in spatial biology, hematopathology, or any other field of medical research, understanding how to collect tissue samples effectively is vital for generating reliable data and advancing scientific knowledge. At Superior BioDiagnostics, we’ve spent years refining our tissue sample collection techniques to support researchers in their quest to improve human health. Let’s dive into the best practices for tissue sample collection, focusing on the importance of meticulous handling and ethical considerations in the process.

The collection of tissue samples is a procedure that involves obtaining a small amount of tissue from the human body for diagnostic or research purposes. These samples are essential for scientific studies, including cancer research, genetic testing, and drug development.

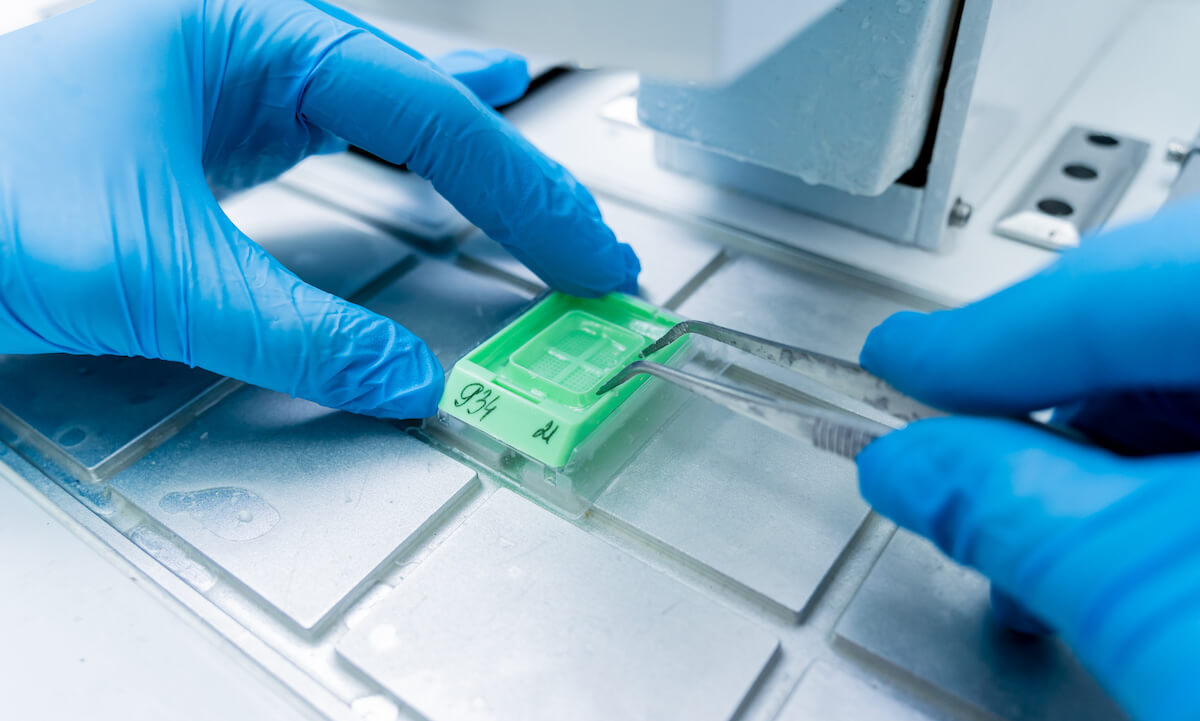
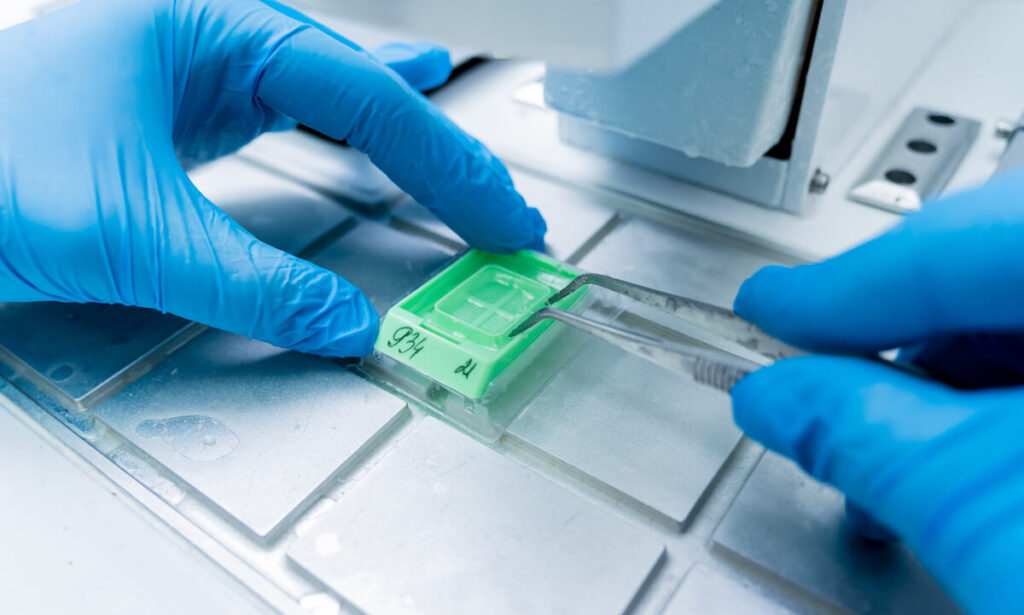
Lab assistant preparing FFPE tissue samples for delivery

Why Quality Matters in Tissue Sample Collection

The quality of tissue samples directly influences the outcomes of research and diagnostic tests. Poorly collected samples can lead to inaccurate results, compromising the validity of a study or the effectiveness of a treatment plan. For instance, how tissue samples are collected can affect the preservation of molecular integrity, which is essential for studies involving DNA, RNA, or protein analysis. For the highest quality results, prioritize the collection of high-quality FFPE (formalin-fixed, paraffin-embedded) human tissue samples. 

6 Important Steps of Tissue Sample Collection

For the success of human tissue research, reputable biobanks offer both normal, malignant, and disease-state tissue samples, including breast, cervical, lung, muscle, uterine, and more. To achieve the highest standards in tissue sample collection, 6 key practices should be followed. These practices ensure that the samples remain viable for research and diagnostic purposes, maintaining their integrity from the point of collection to their final use: 

Step 1: Preparation and Planning

Before collecting tissue samples, it’s essential to plan and prepare thoroughly. This includes understanding the specific requirements of the study or diagnostic tests, such as the type of tissue needed, the size of the sample, and the preservation method required. 

Step 2: Sterilization and Hygiene

Proper planning also involves ensuring that all necessary tools and materials are sterilized and ready for use. All instruments used in the collection process must be thoroughly sterilized to prevent contamination. Additionally, the environment in which the samples are collected should be clean and controlled. This is particularly important in surgical settings where tissue samples are often obtained. 

Step 3: Minimizing Handling

Excessive handling of tissue samples can lead to degradation and contamination. To maintain sample integrity, especially in control samples, it’s crucial to handle tissue samples as little as possible. When handling is necessary, it should be done with care and precision, using tools such as forceps to avoid direct contact with the simple. Minimizing handling is a key principle in tissue sample collection, helping to reserve the biological materials for accurate analysis. 

Step 4: Rapid Preservation

Once the tissue sample has been collected, it must be preserved quickly to prevent degradation. Depending on the type of tissue and the intended use, different preservation methods may be used, such as freezing or embedding in paraffin. Rapid preservation is essential for maintaining the molecular structure of the tissue, which is critical for downstream applications like genetic sequencing or protein analysis. FFPE tissue samples are sustained using a rapid preservation method that is widely recognized for its ability to maintain tissue integrity over long periods. 

Step 5: Accurate Labeling and Documentation

Proper labeling and documentation are vital for tracking tissue samples and ensuring their correct use in research or diagnostics. Each sample should be labeled with detailed information, including the date of collection, the type of tissue, and any relevant patient data (in compliance with privacy regulations). Documentation should also include a clear record of the collection process, storage conditions, and any handling procedures. Accurate labeling and documentation are essential for the success of any study or diagnostic procedure involving tissue samples. 

Step 6: Ethical Considerations

Lastly, ethical considerations are paramount in collecting tissue samples. Before collection, patients or donors must provide informed consent, ensuring they understand the purpose of the collection and how their tissue will be used. Additionally, all tissue sample collection processes should comply with local, national, and international regulations governing the use of human biological materials.

At Superior BioDiagnostics, we are committed to upholding the highest ethical standards in our tissue sample collection practices, ensuring that our work contributes positively to scientific advancement and patient care. How tissue samples are collected can make a significant difference in the success of medical research and diagnostics. By adhering to best practices in tissue sample collection, researchers can ensure the integrity of their samples and the accuracy of their results.

How Tissue Samples Are Collected

Collecting tissue samples is a critical process that requires precision and adherence to best practices to ensure the integrity and usability of the specimens. The method of collection varies depending on the type of tissue, the purpose of the research, and the patient’s condition. 

Tissue collection often involves biopsy techniques, where a small piece of tissue is removed from the body using specialized tools. The approach varies depending on the tissue type. For instance, a needle biopsy uses a hollow needle to extract tissue, often with the aid of imaging techniques like ultrasound or CT scans. In an incision biopsy, a small incision is made to remove part of the tissue, typically used for skin or tumor samples. An excisional biopsy involves the removal of an entire lump or suspicious area for examination, and a surgical resection is used when larger tissue samples are required, often during surgery. 

The samples are then transported under controlled conditions to a biobank like Superior BioDiagnostics, where they are processed and preserved for research or diagnostic purposes. For FFPE samples, the tissue may be prepared for examination in paraffin wax after staining and fixation, making it easier to slice into thin sections for microscopic examination. Strict quality control checks are performed to ensure the sample’s integrity, confirm it is free of contamination, and verify that it meets the specific requirements of the research or diagnostic tests before being released to researchers.

Support Your Next Discovery with Superior BioDiagnostics

Tomorrow’s discoveries demand the latest techniques and best practices for tissue sample collection. Researchers require exceptional samples representative of the biological materials they need for their work. Whether you’re conducting spatial biology research, developing new pharmaceuticals, or exploring innovative diagnostic methods, Superior BioDiagnostics is here to support your efforts with top-tier biospecimen solutions.

The Superior BioDx biobank is dedicated to providing researchers with the highest-quality FFPE human tissue samples sourced and preserved with the utmost care. With a focus on precision, quality, and ethical responsibility, we’ve become a trusted partner for leading scientific facilities and research centers worldwide. Discover high-quality biospecimen services to advance science and enhance human health. Order from Superior BioDiagnostics today to propel your next breakthrough.

Categories
Uncategorized

6 Benefits of Automated DNA Extraction

6 Benefits of Automated DNA Extraction

DNA extraction is a fundamental process underpinning many research and diagnostic applications in molecular biology. Traditionally, this has been a labor-intensive process prone to variability and errors when performed manually. However, technological advancements have led to the development of automated DNA extraction systems, offering numerous advantages over manual methods. Keep reading to explore 6 key benefits of automated DNA extraction, how this process of extraction works, and compare it to manual DNA extraction methods. 

DNA bands in agarose gel as shown under the UV light

What is Automated DNA Extraction?

Automated DNA extraction refers to using systems and machines to isolate DNA from various biological interventions and minimizing the risk of human error. By utilizing an automated DNA extraction system, laboratories can achieve higher throughput, enhanced consistency, and improved accuracy in their DNA extraction protocols.

6 Benefits of Automated DNA Extraction

1. Increased Throughput and Cost-Effectiveness

One of the most significant advantages of automated DNA extraction is the ability to process many samples simultaneously. Automated systems can handle multiple samples in parallel, significantly increasing throughput compared to manual DNA extraction methods. This capability is particularly beneficial for large-scale studies and high-throughput screening applications, often leading biomedical professionals to search for a trusted biospecimen provider.

Although automated DNA extraction systems may require a significant initial investment, they result in substantial long-term cost savings. Automation reduces labor needs, minimizes errors, and increases overall efficiency, making it a more cost-effective operation than manual DNA extraction over time.

2. Enhanced Reproducibility and Consistency

Automated DNA extraction systems eliminated the variability associated with manual techniques. Manual extraction can be influenced by the technician’s skills and experience, leading to inconsistencies in DNA yield and purity. Automation ensures that each sample is processed under identical conditions, producing highly reproducible and consistent results. 

3. Time and Labor Savings

Manual DNA extraction is a time-consuming and labor-intensive process that requires multiple steps and careful handling of reagents. By contrast, automated DNA extraction systems streamline the workflow, reducing the hands-on time required from technicians. This allows laboratory personnel to focus on other critical tasks, improving overall efficiency and productivity. 

4. Reduced Risk of Contamination

Contamination is a significant concern in DNA extraction, as it can compromise the integrity of the results. Automated DNA extraction systems are designed to minimize the risk of contamination by reducing the number of manual handling steps. Closed systems and automated pipetting further decrease the likelihood of cross-contamination between samples.

5. Improved DNA Yield and Quality

Automated DNA extraction systems are optimized to maximize DNA yield and purity. These systems use precise and controlled conditions for each step of the extraction process. Ensuring the DNA is efficiently isolated and free from contaminants. The result is high-quality DNA that is suitable for a wide range of downstream applications, including PCR, sequencing, and genotyping. 

6. Scalability and Flexibility

Automated systems offer scalability and flexibility, allowing laboratories to adjust their workflows based on sample volume and throughput requirements. Whether processing a few samples or hundreds, automated DNA extraction systems can be tailored to meet the specific needs of the laboratory.

Comparing Automated DNA Extraction & Manual DNA Extraction

While manual DNA extraction methods have been the standard for many years, they have several limitations compared to automated techniques. Here are some key differences to consider:

Manual DNA Extraction

  • Labor-Intensive: Manural DNA extraction requires significant hands-on time and multiple steps.
  • Variable Results: The samples are subject to inconsistencies due to human error and variations in technique. 
  • Lower Throughput: Manual extraction allows limited capacity to process multiple samples simultaneously. 
  • Higher Risk of Contamination: There is an increased potential for contamination due to manual handling.
  • Time-Consuming: The process of manually extracting DNA is slower, creating longer turnaround times.

Automated DNA Extraction

  • Efficient: Automated DNA extraction offers a streamlined process with minimal hands-on time.
  • Consistent Results: An automated system allows high reproducibility and uniformity across samples.
  • High Throughput: Professionals can process large numbers of samples simultaneously by using automated extraction systems.
  • Reduced Contamination Risk: Fewer manual steps and an automated extraction process reduce the potential for contamination.
  • Fast and Reliable: Automated DNA extraction maintains faster turnaround times with reliable DNA yield and quality.

The 5 Steps of Automated DNA Extraction Systems

Automated DNA extraction systems typically follow a series of standardized steps to isolate DNA from samples. These steps include cell lysis, DNA binding, washing, and elution. 

Step 1: Sample Preparations

Biological samples are prepared and loaded into the automated DNA extraction system. The system can handle a variety of sample types, including blood, tissues, and cells.

Step 2: Cell Lysis 

The system lyses the cell to release DNA into the solution. This step involves breaking down cell membranes using chemicals or enzymatic methods. 

Step 3: DNA Binding 

The released DNA binds to a solid phase, such as silica membranes or magnetic beads, within the systems. This step isolates the DNA from other cellular components. 

Step 4: Washing

The system performs a series of washes to remove contaminants and impurities from the bound DNA.

Step 5: Elution 

Finally, the purified DNA is eluted from the solid phase and collected for downstream applications.

Order Premier Samples with Superior BioDiagnostics

With the ability to automate DNA extraction processes, molecular biology has experienced significant transformation. Automated DNA extraction systems have revolutionized the field, offering enhanced efficiency, reproducibility, and consistency in extracting DNA from various biological sample types. These systems have become indispensable tools, supporting advancements in research and diagnostics by streamlining workflows and ensuring high-quality DNA yield. Researchers and diagnosticians can now conduct large-scale studies and high-throughput screening with greater accuracy and reduced risk of contamination.

For superior-quality biomedical samples that facilitate your next groundbreaking discovery, look no further than Superior BioDiagnostics. Whether you are involved in cutting-edge research or critical diagnostic work, automated DNA extraction systems will streamline your productivity. Our team is dedicated to assisting your critical investigations in the fields of spatial biology, hematopathology, dermatopathology, and diagnostic research. We provide FFPE tissue samples from a variety of anatomical sites, including breast, cervical, lung, muscular, and uterine tissue, among othersOrder your biospecimens and experience the benefits of advanced DNA extraction technology in your work. 

Categories
Uncategorized

FFPE Tissue in IHC Research: Exploring Protocols and Best Practices

FFPE Tissue in IHC Research: Exploring Protocols and Best Practices

Formalin-fixed paraffin-embedded (FFPE) tissues play a crucial role in immunohistochemistry (IHC) research, allowing for the precise visualization of specific antigens within tissue sections. The accuracy and reproducibility of IHC results heavily depend on the rigor of the IHC protocol, particularly for FFPE tissues. Let’s dive into the essentials for IHC examination, its protocols, and best practices for FFPE tissues. 

Scientist preparing slides with paraffin embedded tissue samples for immunohistochemistry assay in the laboratory.

Understanding How FFPE Tissues Advance IHC Research

IHC techniques play a pivotal role in modern medical diagnostics and research. According to the Cleveland Clinic, “IHC uses your body’s powerful fighters, antibodies, to expose harmful, microscopic substances that cause disease.” In IHC research, samples undergo immunohistochemical staining to detect specific proteins or antigens. This process is widely used in diagnostics, research, and therapeutic monitoring. The technique leverages antibodies to bind to target antigens in the tissue, with subsequent visualization through chromogenic or fluorescent detection methods. IHC research is critical in FFPE tissue analysis because it allows for clear visualization of specific proteins within the preserved tissue architecture, aiding in accurate diagnosis and research into protein expression. 

Importance of IHC Research in FFPE Tissue Analysis

Immunohistochemistry (IHC) research is crucial in the analysis of various FFPE tissue types because it provides for the visualization and localization of specific proteins within the preserved tissue architecture, aiding in accurate disease diagnosis and research into tissue-specific protein expression. It is a powerful tool for:

  • Diagnosing diseases, particularly cancers, by identifying specific biomarkers.
  • Researching the role of proteins in various biological processes.
  • Evaluating the effectiveness of therapeutic inventions by assessing target protein expression. 

IHC Protocol for Paraffin Embedded Tissue

Formalin-fixed paraffin-embedding is a common method for preserving and preparing tissue samples for IHC research. The process involves several meticulous steps to ensure the integrity and clarity of the stained tissue sections. Trusted biobanks provide high-quality samples, which offer researchers and clinicians a reliable foundation for their research. The IHC protocol for FFPE tissue is broken down by ThermoFisher into 7 primary steps:

Step 1: Tissue Preparation and Fixation 

  • Tissue Collection: Obtain tissue samples and place them immediately in a fixative, commonly 10% neutral buffered formalin.
  • Fixation: Allow tissues to set for 24–48 hours. Proper fixation is critical to preserve tissue morphology and antigenicity.
  • Dehydration and Embedding: Dehydrate tissue through a series of ethanol baths, clear with xylene, and embedded in paraffin. The paraffin blocks can then be sections into thin slices (typically 3-5 micrometers thick) with a microtome. 

Step 2: Sectioning and Mounting

  • Sectioning: Use a microtome to cut thin sections from the paraffin block. Float sections on a water bath to flatten them, and then pick them up with the glass slider. 
  • Drying: Dry the slides to ensure proper adhesion of tissue sections to the slides. Warmer drying temperatures will speed up the adhesion process. 

Step 3: Deparaffinization and Rehydration

  • Deparaffinization: Remove paraffin by immersing slides in xylene.
  • Rehydration: Rehydrate tissues by passing slides through decreasing concentrations of ethanol (100%, 95%, 70%, 50%) and then into distilled water. 

Step 4: Antigen Retrieval and Protein Blocking

  • Heat-Induced Epitope Retrieval (HEIR): Place slides in a retrieval buffer (e.g., citrate buffer, pH 6.0) and heat in a microwave, pressure cooker, or water bath. This step restores antigenicity masked by formalin fixation.
  • Peroxidase Blocking: Incubate slides in 3% hydrogen peroxide for 10 minutes to block endogenous peroxidase activity.
  • Protein Blocking: Use a protein-blocking solution (e.g., normal serum or commercial blocking buffer) to prevent non-specific binding antibodies. 

Step 5: Primary & Secondary Antibody Incubation

  • Antibody Dilution: Dilute the primary antibody in diluent according to the manufacturer’s instructions. 
  • Incubation: Apply the primary antibody to the tissue sections and incubate at room temperature for 1 hour. 
  • Secondary Antibody: Apply a secondary antibody that is conjugated to an enzyme (e.g., HRP) or a fluorophore. 
  • Incubation: Incubate for 30 minutes to 1 hour at room temperature.

Step 6: Chromogenic & Fluorescent Detection 

  • Chromogenic Detection: If using an enzyme-conjugated secondary antibody, apply a substrate-chromogen solution (e.g., DAB) to visualize the antigen-antibody complexes.
  • Fluorescent Detection: If using a fluorophore-conjugated secondary antibody, proceed to counterstaining and mounting. 

Step 7: Counterstaining and Mounting

  • Counterstaining: Stain the tissue sections with hematoxylin to provide contrast.
  • Mounting: Dehydrate the sections again, clear them with xylene, and mount them in a permanent mounting medium. 

IHC Research with FFPE Tissue: Troubleshooting 4 Common Problems

Even with meticulous protocol, issues can arise. The Protein Biology Resource Library reported a few common troubles researchers may encounter during their IHC analysis. Let’s explore these issues and troubleshoot solutions: 

  1. Weak Staining: Weak staining can diminish visibility. Ensure optimal antigen retrieval and check antibody dilutions. Increase primary antibody concentration or incubation time.
  2. Non-Specific Staining: Use a more stringent blocking step or increase the blocking time. Ensure primary antibodies are specific to the target antigen.
  3. High Background: It is important to distinguish the background tissue from the point of interest. Thorough washing between steps is crucial. Consider increasing wash times or using a more effective blocking buffer.
  4. Autofluorescence: Certain preventable factors or the inherent nature of FFPE samples can cause undesirable autofluorescence. This can be avoided by using fluorescence-quelching dyes like Pontamie sky blue, Sudan black, or Trypen blue or by switching to frozen sections. 

Achieving consistent and reliable results during IHC protocols requires adherence to several best practices. Standardizing protocols is crucial; consistent procedures and reagents across all experiments ensure reproducibility and minimize variability. Optimizing antibody conditions is also essential; carefully adjust the concentration and incubation times for primary and secondary antibodies to achieve the best staining results. Validation of antibodies is another key step; new antibodies should be validated with known positive and negative controls to confirm their specificity and sensitivity.

Utilizing Superior BioDiagnostic’s FFPE Tissues for IHC Analysis

IHC analysis of FFPE tissue is a powerful technique for visualizing specific antigens within tissue samples, offering valuable insights for diagnostics and research. With high-quality samples from Superior BioDiagnostics, researchers and clinicians can achieve clear, reliable results. Whether you’re diagnosing diseases, conducting research, or evaluating therapeutic interventions, the precision of your FFPE tissue for IHC protocols is vital to unlocking the full potential of immunohistochemistry. Order your normal, malignant, and disease-state samples with Superior BioDx today!

Categories
Uncategorized

What Are FFPE Curls?

What Are FFPE Curls?

Formalin-fixed paraffin-embedded (FFPE) curls play a crucial role in the rapidly advancing world of histology and pathology. FFPE tissue curls refer to the small sections of biological tissue that have undergone a preservation and embedding process, making them invaluable for research and diagnostic purposes. Keep reading to delve into the significance of FFPE curls, their preparations, and their applications in scientific and medical research.

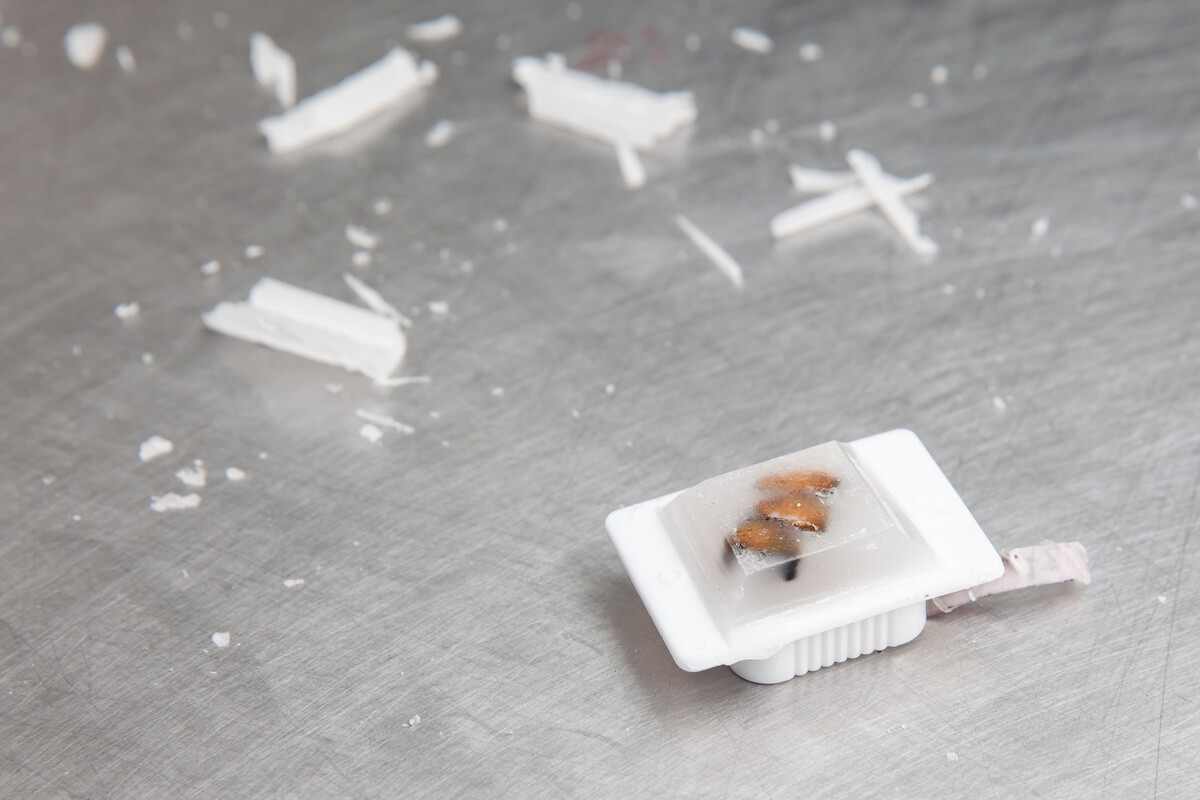
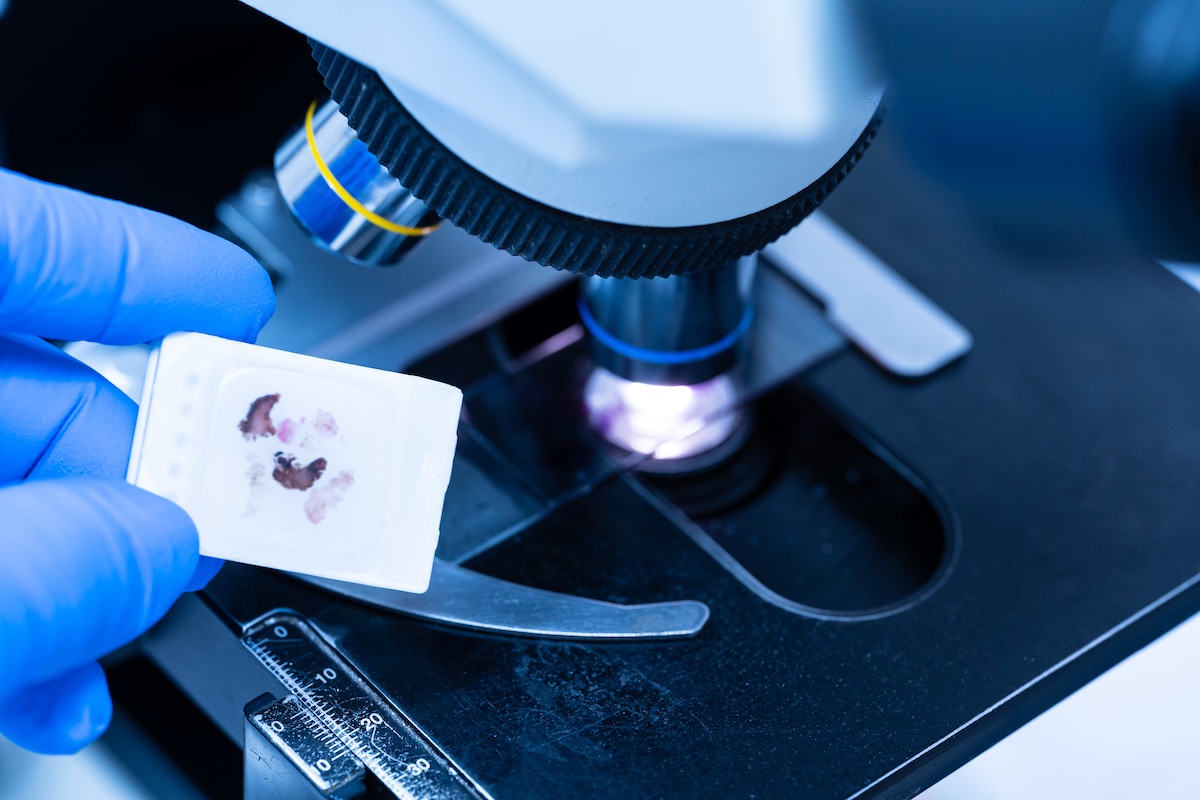
Researcher analyzing FFPE curl under microscope

Understanding FFPE Curls

FFPE curls are thin, curled shavings of tissue that are meticulously prepared for microscopic examination and analysis. The process begins with tissue samples, which are preserved using formalin (a solution of formaldehyde in water). This crucial fixation halts biological processes, preserving the tissue’s cellular architecture and preventing decay. Following fixation, the tissue is embedded in paraffin wax, a process that stabilizes the sample for long-term storage and facilitates thin sectioning. 

5 Essential Steps to Prepare FFPE Tissue Curls

The journey from tissue to FFPE curls involves several meticulous steps

1. Tissue Fixation:

The fresh tissue sample is immersed in formalin, which cross-links proteins and nucleic acids, effectively preserving the sample at a molecular level. This process usually takes between 6 and 48 hours, depending on the tissue size and type

2. Dehydration: 

After that, a series of alcohol baths are used to eliminate any last traces of moisture from the fixed tissue. Dehydration is essential because paraffin and water do not mix.

3. Clearing:

After dehydration, the tissue is treated with xylene or a similar solvent, which makes the tissue transparent and prepares it for infiltration with paraffin. 

4. Embedding:

The cleared tissue is then infiltrated with melted paraffin wax. Once thoroughly filled, the tissue is placed in a mold with more paraffin and allowed to harden, forming a solid block.

5. Sectioning:

Using a microtome, the paraffin-embedded tissue block is sliced into ultra-thin sections, typically 4–5 micrometers thick. These thin sections, known as FFPE tissue curls, are collected and placed onto glass slides for staining and microscopic examination.

The Importance of FFPE Curls

FFPE curls provide unmatched insight into the mysteries of biomedical research. Through an exact procedure, researchers are able to preserve samples in a way that prevents degradation and decay. FFPE curls have proven to be extremely useful in various fields, including:

Diagnostic Application

FFPE tissue curls are a cornerstone of pathology. They allow pathologists to examine the microscopic structure of tissues, aiding in the diagnosis of various diseases, including various cancers, genetic disorders, and congenital disabilities. By analyzing these curls, pathologists can identify abnormal cell morphology, tissue architecture, and other histological features indicative of disease. 

Research and Development

Beyond diagnostics, FFPE curls are invaluable in medical research. Researchers use samples to study disease mechanisms, identify biomarkers, and develop new treatments. The preservation of genetic materials in FFPE tissue allows for molecular analyses, such as DNA and RNA sequencing, which are critical for understanding genetic mutations and their roles in disease. 

Advantages of Using FFPE Tissue Curls

Since their introduction decades ago, FFPE tissue samples have provided researchers and medical professionals with important information that helps them treat complex diseases like cancers. Thanks to these special samples, FFPE samples can be studied without being harmed in a way that prevents further research. 

Long-Term Preservation

One significant advantage of FFPE tissue curls is their longevity. Properly prepared FFPE samples can be stored for decades without significant degradation. This long-term preservation is particularly beneficial for retrospective studies, where researchers can analyze historical tissue samples to gain insights into disease progression and treatment outcomes over time. 

Wide Availability

FFPE tissue curls are widely available in pathology labs and biorepositories worldwide. This widespread availability facilitates large-scale studies and collaborative research efforts, enabling scientists to share and compare data across different populations and regions. 

Compatibility with Advanced Techniques

Modern molecular biology techniques, such as PCR (Polymerase Chain Reaction) and next-generation sequencing (NGS), are compatible with FFPE tissue curls. This compatibility allows researchers to extract and analyze genetic material from preserved tissues, opening new avenues for genetic and genomic studies.

Challenges and Considerations

Though the benefits of FFPE curls are overwhelming, the challenges involved with correctly preserving delicate tissues can mean the difference between a successful preparation and a tissue that will yield inaccurate results. Consider the following factors when selecting a reputable biobank provider: 

Quality Control

Despite their advantages, the preparation of FFPE tissue curls requires meticulous attention to detail. Variations in fixation time, dehydration, cleaning, and embedding can affect the quality of the final sample. Therefore, standardized protocols and rigorous quality control measures are essential to ensure the reliability and reproducibility of results. 

Degradation of Nucleic Acids

While FFPE preservation maintains the structural integrity of tissues, it can sometimes lead to fragmentation of nucleic acids. This degradation poses a challenge for molecular analyses, particularly when studying dated or poorly preserved samples. Advances in extraction and amplification techniques are continually improving the ability to work with degraded nucleic acids from FFPE curls.

Future Perspectives of FFPE Curls

FFPE tissue curls are merely a stepping stone in the journey to biomedical understanding of disease and health. Examining FFPE samples has led to various discoveries for researchers, but with proper sample preservation, FFPE samples have a special potential to advance future medical research as well. FFPE curls have a wide range of potential future applications, which include: 

Technological Advancements

The field of histology and pathology is continually evolving, with new technologies and methods enhancing the utilization of FFPE tissue curls. Digital pathology, for instance, is revolutionizing the way tissue samples are analyzed and shared. High-resolution digital scanning allows for the creation of virtual slides(digitally scanning physical FFPE slides to share them from anywhere in the world), enabling pathologists and researchers to examine FFPE tissue curls remotely and collaborate more effectively.

Personalized Medicine

The integration of FFPE tissue analysis with genomic and proteomic data is paving the way for personalized medicine. By understanding the molecular and genetic underpinnings of diseases, clinicians can tailor treatments to individualize patients, improving outcomes and minimizing adverse effects.

Order Top-Quality FFPE Curls from Superior BioDoagnostics

FFPE curls are vital in biomedical research. The delicate process of preparing FFPE tissue samples, if performed properly, can provide answers to longstanding medical mysteries. The advantages of using FFPE tissue curls, such as long-term preservation, wide availability, and compatibility with advanced techniques, make these thin samples hold a major significance in pathology medical research. Order from a top biobank provider like Superior BioDx for only the best human FFPE tissue curls.

Categories
Uncategorized

PCR Using DNA From FFPE Tissue Samples

PCR Using DNA From FFPE Tissue Samples: A How-To Guide

Polymerase Chain Reaction (PCR) is a widely accepted technique used in molecular biology, aiding researchers in amplifying and analyzing specific DNA sequences with heightened accuracy. However, when DNA is extracted from Formalin-Fixed, Paraffin-Embedded (FFPE) samples, you’ll face unique challenges due to DNA fragmentation and chemical modifications introduced during the preservation process. 

In this complete how-to guide, we walk you through how to perform PCR on FFPE-derived DNA. We share helpful tips and best practices, ensuring your PCR testing is accurate and efficient. Whether you’re an experienced researcher or utterly new to this field, our guide will give you the knowledge and expertise to achieve reliable results in your PCR analyses. Keep reading if you’d like to learn how to conduct PCR techniques on DNA collected from FFPE tissue samples!

Researcher holding PCR tube to put into PCR machine

What Are FFPE Tissue Samples?

Formalin-fixed paraffin-embedded (FFPE) tissue samples are essential to scientific and medical research. FFPE is a preservation technique that aids in maintaining the cellular and tissue structure of biospecimens, preparing them for various purposes, including cancer research, genetic studies, immunohistochemistry (IHC), translational clinical research, and more. 

FFPE tissue samples are fixed in formalin, embedded in paraffin wax, and stored in biobanks, laboratories, or hospitals. After the preservation process, these samples can be used for decades. 

The Basics of PCR

Polymerase Chain Reaction (PCR) is a widely used technique in which short sections of DNA or RNA are amplified into multiple copies using primer-mediated enzymes. PCR allows researchers to make billions of copies of a specified DNA gene or fragment, permitting the investigation and identification of gene sequences using visual tactics based on charge and size.

polymerase chain reaction

There are 3 primary steps involved in PCR: denaturation, annealing, and extension. Outlined below is what happens during the amplification process: 

  1. Denaturation: Denaturation involves heating the selected double-stranded DNA sample to about 94℃ for 0.5–2 minutes. This temperature breaks down the hydrogen bonds between both strands of DNA, converting them into a single strand. Researchers will use this single-stranded DNA as a template for producing new strands. If necessary, the high temperature must be applied for an extended period to ensure the separation of the two strands. 
  2. Annealing: Next, researchers will lower the temperature to 54–56℃ for about 20–40 seconds. During this time, the primers will anneal or stick to their complementary regions on the template DNA. Primers are sections of single-stranded RNA or DNA around 20–30 bases in length. Lowering the temperature allows hydrogen bonds to form between the template DNA and primers in areas where the section corresponds. Both separated strands of DNA run in opposite directions with two primers: a forward and a reverse primer. 
  3. Extension/Polymerization: During extension, the temperature is again raised to 72–80℃. Then, the DNA polymerases are added to the 3’ end of each primer. These enzymes move along the DNA base by base in the 5’ to 3’ direction, adding the matching DNA nucleotides as it goes. The DNA polymerase often adds about 100bp/minute under pristine conditions. As the polymerase attaches to the primer, it adds DNA bases to the single strand, resulting in a double-stranded DNA molecule. 

Denaturation, annealing, and extension are usually repeated 20–40 times to obtain the necessary number of DNA sequences of interest quickly. PCR testing contributes to diagnosing infectious diseases, monitoring the gene in gene therapy, genetic fingerprinting and paternity tests in forensic science, finding small amounts of cancer cells that could be overlooked in other studies, and more.

Can You Do PCR On DNA From Formalin-Fixed Paraffin-Embedded Tissue? Yes, Here Are 5 Steps You Can Follow

If you’d like to try PCR testing on DNA extracted from FFPE tissue samples, here are 5 simple steps you can follow:

Prepare the FFPE Tissue Samples for DNA Extraction

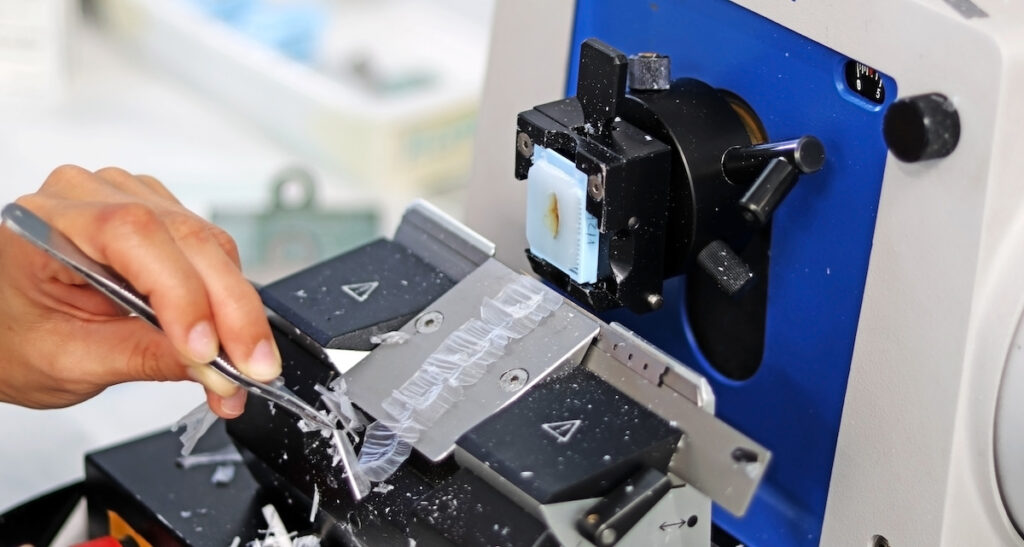
You’ll need to use a microtome to cut the exposed FFPE tissue samples into thin sections (5–10 micrometers). A microtome slices specimens continuously, creating a “ribbon” of tissue sections that can be used for DNA extraction. After cutting, you can place the FFPE tissue sections in microcentrifuge tubes. Then, the FFPE tissue samples need to be deparaffinized. Remove the paraffin using a series of xylene washes and ethanol rinses to rehydrate the biospecimens. 

Extract DNA and Run a Quality Assessment

After preparing the FFPE tissue samples, it’s time to treat the deparaffinized specimens with proteinase K. This enzyme allows the specimens to break down a wide range of proteins and release DNA. The use of proteinase K in DNA extraction reduces the risk of false negatives or various errors that can arise in diagnostic studies. 

Incubate the DNA and proteinase K mixture at 55–65℃ for several hours or overnight, ensuring the protein contaminants are removed from the DNA samples before the PCR process. This will increase the likelihood of reliable results. Following incubation, use a DNA extraction kit (specialized for FFPE samples) or phenol-chloroform extraction to purify the DNA.

It’s essential to quantify the DNA concentration at this time. A spectrophotometer (e.g., Nanodrop) or fluorometer (e.g., Qubit) is used to measure the DNA concentration. Additionally, ensure the quality of the DNA by running a small section on an agarose gel. The FFPE DNA is commonly fragmented, which is normal. 

Optimize and Prepare PCR Setup

Before performing PCR testing, you need to prepare the setup and ensure quality at every step. Here are 3 best practices for optimizing your PCR process:

    1. Practice Expert Primer Design: Due to the formalin fixation process, FFPE specimens often contain highly fragmented DNA. In this case, design a primer that amplifies short DNA sections (100–300 base pairs). Professional primer design technology (e.g., Primer3, NCBI Primer-BLAST) should be used to make certain the primers are customized to the specified sequence instead of forming secondary structures or primer dimers.
    2. Invest in High-Quality PCR Reagents: We recommend using a high-fidelity DNA polymerase, precisely one that’s compatible with complex templates. These polymerases are increasingly tolerable to the inhibitors often appearing in FFPE-derived DNA. For your PCR buffers, use ones that are provided with high-fidelity DNA polymerases since they’re ideal for challenging templates. 
    3. Include Additives: PCR additives or enhancers can improve the overall amplification efficiency. Consider adding bovine serum albumin (BSA) or dimethyl sulfoxide (DMSO) to stabilize the polymerase and improve the PCR process on difficult DNA templates. Other additives, including betaine or formamide, can also reduce the chance of secondary structures. 

After gathering your supplies, it’s time to prepare the PCR setup. Assemble the PCR reaction mixture, including the primers, template DNA, deoxynucleotide triphosphates (dNTPs), buffer, polymerase, and any chosen additives. Then, consider the ideal PCR cycling conditions for your process, which involve denaturation, annealing temperature, extension time, and the number of cycles. 

Perform the PCR Amplifation Process

Using a thermal cycler, you’ll then perform the PCR process on the FFPE-derived DNA. As we’ve mentioned prior, there are 3 steps involved in amplification: denaturation, annealing, and extension. If you’re new to trying PCR, doing a temperature gradient during the process is helpful. Here are the standard cycle conditions for PCR you can start with according to University of Nebraska’s Herman Lab:

Conditions

Guidelines

Denaturation

Temp: 95℃. Time: 2 minutes on initial cycle; 30 seconds to 1 minute on rest.

Annealing

Temp: 5℃ below Tm (melting temperature) of the primers; no lower than 40℃. Time: 30–45 seconds. This is the step where you’d use a gradient.

Extension

Temp: 72℃. Time: ~1 min/kb of the expected product; 5–10 minutes on the last cycle.

Number of Cycles

~30 cycles

Analyze the PCR Products

Once you’ve finished the amplification testing, analyzing the PCR products is crucial to ensure the process is successful. Use agarose gel electrophoresis to determine effective amplification and correct amplicon size. If needed, you can purify the PCR products by utilizing a PCR cleanup kit for purposes such as sequencing or cloning.

Obtain FFPE Tissue Samples for Your PCR Analysis

Are you in need of high-quality FFPE tissue samples for PCR testing? Superior BioDiagnostics has a biorepository containing thousands of pristine FFPE tissue samples that are available for your research purposes. Our biobank specializes in normal, malignant, and disease-state FFPE specimens collected from various anatomical sites, including but not limited to breast, cervical, lung, muscle, and uterus samples. Contact Superior BioDiagnostics today to order FFPE tissue samples and ensure accuracy in your PCR analysis.

Categories
Uncategorized

What is H and E Staining? A Complete Guide

What is H and E Staining? A Complete Guide

Microscopic tissue analyses are essential in the fields of medicine and medical research. Staining techniques are frequently employed to enhance the visibility of cellular structures and enable differentiation between various tissue components. One of the most popular and effective methods currently in use is the H and E stain method. Keep reading to explore the complexities of H&E stains, the technique’s significance, and its applications.
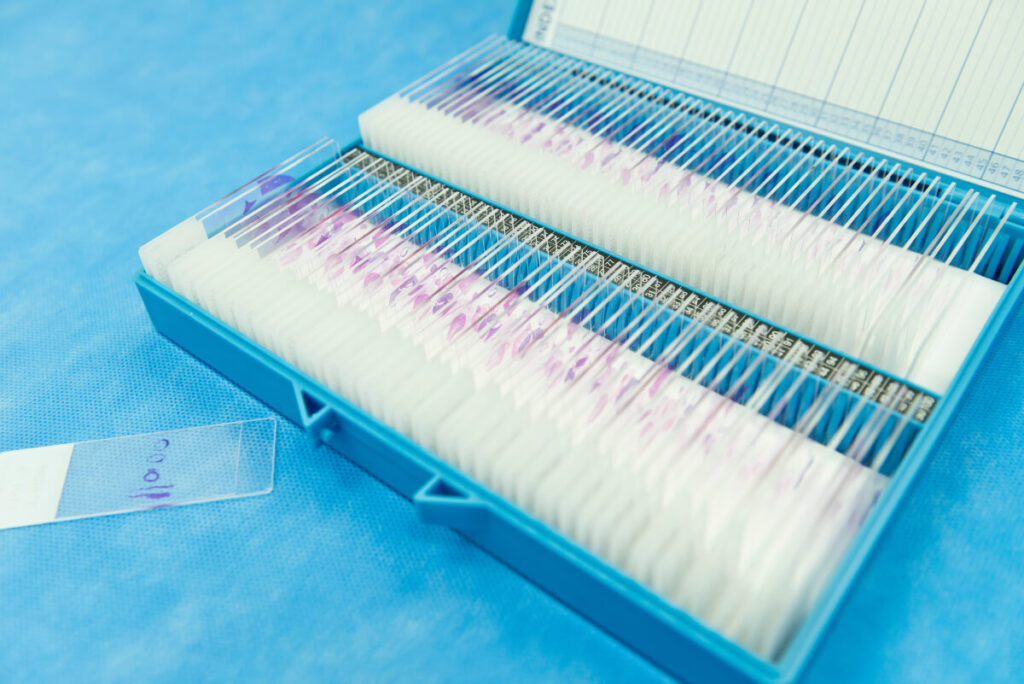
Storage rack of tissue sections on slide glasses used for H&E staining

H&E Stains: A Closer Look

H&E staining, short for Hematoxylin and Eosin staining, is a histological technique for visualizing cellular structures under a microscope. It provides vital information about tissue composition, cellular morphology, and pathological changes. Named after the dyes used in the process—hematoxylin and eosin—H&E stains allow easier identification and detailed analysis by dying specific tissue components with distinct colors.

How to Prepare Human Tissue for H and E Stain

The process of H&E staining involves several procedural steps, each crucial for achieving optimal results. Before a sample can undergo staining, it is prepared using methods that allow for long-term storage and examinations. 

The tissue specimen, obtained through biopsy or surgical excision, is first set in a fixative solution to preserve its structure and prevent degradation. The most common fixative method is called formalin-fixed paraffin-embedded (FFPE) tissue samples. This preservation method involves dehydrating the tissue with an increasingly concentrated drying agent, formalin, which removes water molecules from the tissue, preparing it for infiltration with paraffin. The embedding process supports the tissue and allows for thin sectioning. A microtome is used to create thin sections of the embedded tissue, usually 4-5 micrometers thick. These sections are then mounted onto glass slides for staining. 

Now that the sample is preserved, a section will need to be deparaffinized before it can accept staining agents. Deparaffinization is achieved by immersing the slides in a series of xylene, a volatile liquid created by distilling wood, coal, tar, or petroleum. Xylene is a solvent that will dissolve the paraffin. Next, the sample is rehydrated through an alcohol regimen with decreasing intensity. Finally, the sample is ready for staining.

How To Apply H&E Stains in 4 Steps

  1. Hematoxylin Staining: The tissue sections are immersed in a hematoxylin solution, a basic dye derived from the logwood tree. Hematoxylin selectively stains acidic structures (such as nuclei), imparting a blue-purple color. 
  2. Differentiation: After hematoxylin staining, the slides are rinsed with water or acidic alcohol, removing excess dye. This step is easy, but it is very important because it helps achieve the best contrast and definition of cellular nuclei.
  3. Eosin Staining: The tissue sections are then counterstained with eosin, an acidic dye that stains basic structures such as cytoplasm and extracellular matrix, turning a pinkish-red color.
  4. Dehydration and Mounting: Following H&E stains, the slide is dehydrated in alcohol solutions, flushed in xylene, and mounted with a coverslip using a mounting medium.

Once staining is complete, researchers are able to view structures like nuclei distinctly as a cool, blueish-purple color, clearly separated from cytoplasms and extracellular matrix, which are now dyed bright red.

Applications of H&E Stains

H&E staining finds widespread applications across various fields, including histopathology, biomedical research, and furthering medical education. In medical diagnostics, H&E staining is indispensable for examining tissue specimens to identify pathological changes indicative of diseases such as cancer, inflammation, and infection. The staining pattern and cellular morphology observed under the microscope aid pathologists in making accurate diagnoses.

H&E staining is a fundamental tool in biological research because it allows scientists to study tissue structure, cellular organization, and structural alterations in experimental models. It provides valuable insights into the underlying mechanisms of diseases and the efficacy of potential medical interventions. H&E stains are highly regarded by top biomedical professionals and researchers. The technique is integral to the histology curriculum in medical and life sciences education across the globe. Students learn to interpret tissue sections and recognize normal and abnormal histological features, laying the foundation for understanding disease processes and further discoveries.

Advantages and Limitations of H&E Stains

H&E staining offers several advantages, including simplicity, versatility, and ease of interpretation. The H&E staining protocol is relatively simple and cost-effective, making it accessible to laboratories large and small. H&E staining is incredibly versatile and can be applied to a wide range of tissue types and species, making it suitable for diverse research and diagnostic purposes. The distinct color contrast imparted by H&E staining facilitates easy interpretation of tissue morphology and cellular architecture under the microscope. 

However, H&E staining also has certain limitations, such as interpretive subjectivity, the introduction of unwanted artifacts, and insufficient specificity in research results. Interpreting H&E-stained slides may be subjective and require expertise and experience, particularly in distinguishing subtle biological changes. Additionally, any variations in tissue processing and staining techniques can introduce artifacts, potentially affecting the accuracy of histological assessment. While H&E stains provide an overview of tissue structure, they may not always offer sufficient specificity for certain pathological conditions, necessitating additional ancillary tests. 

H&E staining, with its ability to reveal intricate details of tissue architecture and cellular morphology, remains a cornerstone of histological analysis in both clinical and research settings. By employing a simple yet powerful staining technique, researchers and pathologists can gain invaluable insights into the complex world of biological tissues, paving the way for advancements in diagnosis, treatment, and understanding of human health and disease. 

Quality FFPE samples for H&E Stains by Superior BioDiagnostics

Order your professional-quality FFPE human tissue samples for H&E staining from Superior BioDiagnostics today and discover the genetic secrets of tomorrow. Explore our inventory of normal and malignant samples of varying tissue types, including breast, cervical, muscle, lung, and more. Contact Superior BioDx to order your samples today. 

Categories
Uncategorized

DNA and RNA Extraction from FFPE Tissue

DNA and RNA Extraction from FFPE Tissue

Biomedical research frequently involves long-term studies, making tissue sample preservation essential for further advancements. Formalin-fixed paraffin-embedded (FFPE) tissue is a widely used preservation technique that continues to provide groundbreaking biological insights. This preservation method maintains the tissues’ integrity over an extended length of time and allows for the extraction of multiple sections from a single block. However, researchers face particular complexities when attempting to extract genetic material from FFPE samples. Continue reading to discover the process and understand the special care taken in order to isolate RNA and DNA samples without damaging the material in the process.

Diagram showing DNA molecules

FFPE DNA Extraction, A Slice of Innovative Biomedical Research

FFPE DNA extraction is a sensitive procedure and a trusted practice that holds immense significance in various fields, including cancer research, genetic studies, and forensic investigations. These archived tissue samples offer valuable insights into disease progression, biomarker discovery, and therapeutic plans. The FFPE preservation method was established in the late 1800s, and according to SageJournal’s Journal of Histochemistry & Cytochemistry, DNA extraction from FFPE samples began in the late 1900s. Since then, researchers have taken calculated action to optimize extraction protocols to obtain high-quality genetic material from FFPE samples. The practice has become essential in advancing biomedical research and clinical diagnostics.

Once the genetic material is extracted from the FFPE section, researchers are faced with multiple hurdles to preserve the sample before it succumbs to deterioration. Formalin-induced cross-links and RNase (äreˈnās), enzymes that break down RNA into smaller molecules, exacerbate the molecule’s inherent instability and susceptibility to degradation. To overcome such obstacles, RNA extraction protocols for FFPE samples incorporate methods to reverse cross-links, mitigate RNase activity, and preserve sample integrity.

Overcoming The Challenges of FFPE DNA Extraction

Traditional DNA extraction methods often fail to efficiently recover intact DNA stored for long-term use in FFPE samples without damaging the strands. However, specialized protocols tailored to FFPE tissue have proven to promote the longevity of extracted samples. Heat-induced antigen retrieval is a common pre-treatment step that involves incubating the FFPE tissue sections to maintain their integrity and reverse formalin-induced cross-links.

After incubation, the nucleic acids have been exposed, but the presence of enzymes like RNase often prohibits extraction at this point. Utilize proteases, enzymes that break the peptide bonds of proteins, or proteinase K, to remove any remaining enzymes that could damage your sample. This enzymatic digestion helps break down proteins and release DNA from the cross-linked matrix. If any remaining enzymes are present, samples are oftentimes bound to silica-based columns; fragments of the sample can be isolated using magnetic beads, reducing damage while residual contaminants are removed to complete the process.

Advancements in FFPE RNA Extraction Techniques

Advancements in FFPE RNA extraction techniques have significantly improved the efficiency and reliability of isolating high-quality RNA from archived tissue samples. These advancements address the challenges posed by formalin fixation and degradation, allowing researchers to unlock valuable genetic information stored within FFPE specimens. One notable advancement is the development of specialized extraction kits tailored specifically for FFPE samples. These kits often incorporate innovative reagents and protocols designed to optimize RNA recovery while minimizing sample breakdown.

4 Steps For Successful FFPE RNA Isolation

In addition to the specialized extraction protocols that have revolutionized FFPE RNA isolation, several key considerations must be addressed to ensure optimal results.

  • Sample Quality: The quality of an FFPE RNA isolation often reflects the quality of the original FFPE sample. Assess FFPE sample quality, including tissue fixation duration and storage condition. This crucial step could determine your extraction success. By ordering from a reputable biobank, you can trust the quality of your samples and set your research up for success.
  • Pre-treatment: Tailor pre-treatment steps, such as antigen retrieval and enzymatic digestion, based on sample characteristics to enhance nucleic acid recovery. Different sample characteristics, such as tissue type, age, and preservation method, can affect nucleic acid recovery. For example, heterogeneous samples, like tumors, often need customized protocols to ensure a representative analysis. 
  • RNase Barrier: Incorporate RNase inhibitors throughout the extraction process to safeguard RNA integrity and prevent decay.
  • Quality Control: Implement rigorous quality control measures, such as spectrophotometric analysis–to determine the concentration of DNA and RNA molecules–and PCR-based assays–to determine the presence of pathogens. These tests can be used to validate the integrity, purity, and success of the FFPE RNA isolation.


Unlock the Biomedical Secrets of FFPE Tissue Samples with Superior BioDiagnostics

DNA and RNA extracted from FFPE tissue offer a vital gateway to uncovering the genetic mysteries concealed within archived samples. The recovery of high-quality genetic material from FFPE samples has been transformed by creative extraction techniques despite the difficulties presented by formalin fixation. By adopting specialized methods, researchers will overcome challenges, enable the leverage of the abundant data in FFPE tissue, and propel progress in biomedical research and clinical practice.

Order your FFPE human tissue samples directly from Superior BioDiagnostics to pave the way for transformative discoveries and shape the future of medicine and molecular biology. Contact Superior BioDx–the biobank of choice for top-rated academic institutions–today and launch your research to the future with top-quality FFPE human samples. 

Categories
Uncategorized

FFPE Blocks, Slides, & Sections: Definitions & Use Cases

FFPE Blocks, Slides, & Sections: Definitions & Use Cases

Formalin-fixed paraffin-embedded (FFPE) tissue samples are vital in pathology and biomedical research. This preservation method was established in the late 1800s and has brought incredible understanding to biomedical researchers. Now, FFPE samples provide a long-lasting preserved archive of samples for repeated examinations. Keep reading to learn the stages of a sample collected for FFPE preservation and explore the diverse uses of FFPE tissue samples across different disciplines.

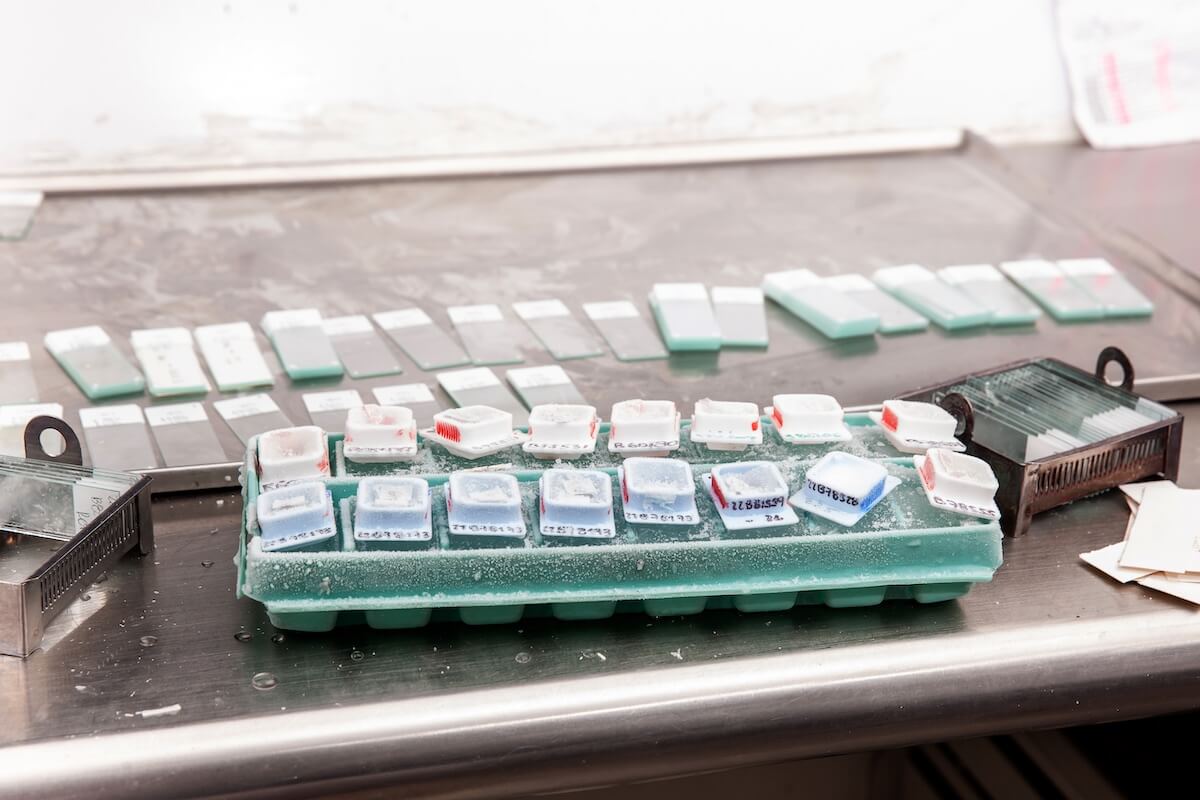
A tray on lab table carrying ffpe blocks, slides, and sections

What Are FFPE Tissue Blocks, Slides & Sections?

FFPE Tissue Blocks

Collecting tissue to create a formalin-fixed paraffin-embedded sample is a process that can take many forms. Doctors have the option to biopsy diseased tissue, healthy tissue, or both. FFPE tissue blocks usually require a biopsy of only a few millimeters of tissue, making the process quick, efficient, and generally painless.

Immediately following the biopsy, the tissue is submerged in formalin for 18–24 hours to preserve the tissue’s pristine condition. Next, the preserved tissue is dehydrated before being embedded in IHC-grade paraffin wax. Immunohistochemistry (IHC) is a clinical method that uses antibodies to check for antigens with a fluorescent dye. IHC-grade paraffin wax has the ability to accept these dyes to be used in IHC testing.

By preserving the tissue in this way, researchers can cut sections from the FFPE block for closer examination.

FFPE Tissue Sections

FFPE sections are thin slices of tissue cut from FFPE blocks. These sections are then prepared using a microtome (a device that trims the tissue to precise depths ranging from a few micrometers to several millimeters). FFPE sections are used for a wide range of microscopic studies.

FFPE sections stored in archives have the ability to last up to 20 years! They offer a historical perspective on disease and a clear record of medical advancements. FFPE is a versatile preservation method; sections can be stored at room temperature, making FFPE sections a less expensive option to preserve and study the microscopic structures and the protein makeup of test samples. These sections can be mounted onto slides for examination under a microscope.

FFPE Tissue Slides

FFPE slides are thin sections of tissue samples mounted onto glass slides from FFPE blocks. These slides are typically stained for microscopic examination using various histological or immunohistochemical techniques. FFPE slides allow pathologists and researchers to visualize tissue morphology and study cellular structure under a microscope.

4 Common Uses of FFPE Tissue Blocks, Slides & Sections

1. Histopathology

Histopathology is the study of the change of tissue over time as a result of a disease. FFPE tissue samples are often used in diagnostic histopathology to diagnose diseases like cancer. Pathologists examine FFPE slides under a microscope to identify irregular cellular structures, tissue architecture, and other pathological features that indicate disease.

2. Molecular Biology Research

Scientists can extract DNA and RNA from FFPE sections to study genetic mutation, gene expression patterns, and epigenetic modifications associated with various diseases.

3. Drug Development

FFPE tissues are frequently used in the drug development process. Researchers use FFPE sections to assess drug efficiency or toxicity.

4. Forensic Pathology

FFPE blocks are valuable in forensic pathology for preserving tissue samples from cases involving biomatter. These samples can be archived for long periods of time, allowing forensic scientists to conduct postmortem examinations and investigations into the cause and manner of death.

FFPE Tissue Samples—A Closer Look at The Future

Formalin-fixed paraffin-embedded (FFPE) tissue samples have become vital in pathology and biomedical research. FFPE blocks, slides, and sections have become a standard in diagnostic histopathology to diagnose diseases since the preservation method’s inception in the 19th century. FFPE tissues are frequently used in the drug development process and forensic pathology to preserve tissue samples from cases involving biomatter. FFPE is a versatile preservation method; FFPE sections can be stored at room temperature, making them less expensive options to preserve and study the microscopic structures and the protein makeup of test samples.

Are you interested in the benefits of FFPE tissue blocks, sections, or slides for your research? Join top-rated academic institutions and biomedical companies that have made Superior BioDiagnostics their choice biobank supplier. Order your FFPE samples today!

Categories
Uncategorized

The Importance of Control Tissues

The Importance of Control Tissue in Medical and Scientific Research

Control groups are a necessary component of medical research. Control tissue samples are commonly used as a reference in biomedical research; these tissue samples can be collected from patients who are either entirely unaffected by the condition being studied or by using a healthy area from the patient’s body. Similar to control groups, control tissue samples are crucial to verifying results (and proving they are not the outcome of coincidence).

Control samples are used as benchmarks to diagnose or observe biopsy samples and are vital to establishing a treatment’s accuracy, reproducibility, and reliability. Researchers have launched biomedical research years into the future through hypothesis testing with control samples. In this article, we explore the importance of control tissue and FFPE samples in medical research.

Lab technician preparing a FFPE control tissue slide

What are FFPE Control Tissue Samples?

Formalin-fixed paraffin-embedded (FFPE) tissue samples are preserved using formalin and then embedded in paraffin wax and are commonly used as control samples in medical diagnostics. FFPE control tissue samples are great for experimental tests. The wax allows researchers to examine multiple extremely thin and fragile sections from a single biopsy.

According to the National Library of Medicine, “Pathology departments routinely archive vast numbers of FFPE blocks as compared to frozen tissues. This largely untapped resource represents an extensive repository of tissue material with a long-term clinical follow-up, providing a valuable resource for translational clinical research.”

FFPE control tissue creates standardization and quality control. These tissues provide a stable reference point for experimental procedures, ensuring that tests are performed consistently across different laboratories over time.

Validation Tissue & Benign Tissue Samples

Validation tissues are often used to compare experimental findings/diagnostic attempts. These samples are chosen because they show distinct characteristics that accurately represent the illnesses studied. Validation tissues are control measures to guarantee the quality and repeatability of findings. Researchers can detect and correct an experiment’s inconsistencies or errors using the tissues’ known characteristics.

Benign tissue samples are other types of control tissue collected from areas of the body that exhibit non-malignant, non-cancerous, or otherwise healthy characteristics. These samples serve as comparisons in diagnostic research. Oncologists have advanced biomarker studies by examining benign samples to create personalized cancer treatments. This customized treatment allows doctors to target the illness efficiently. Benign samples create a baseline for comparison with diseased tissue. Researchers can gain insights into illness progression, biomarker discovery, and therapeutic targets by analyzing the differences between benign and diseased tissues at the molecular, cellular, or microscopic levels.

Did you know that 75%–85% of biopsies lead to a benign result diagnosis? These frequently studied samples are in high demand for biomedical research. As your trusted biobank, Superior BioDiagnostics provides high-demand samples to keep your research moving.

The Future of Biodiagnostics

Control tissue samples are used as independent variables in clinical research and diagnostics. They serve as uncorrupted benchmarks that researchers can compare with test samples to diagnose and monitor conditions. With formalin-fixed paraffin-embedded (FFPE) samples, validation samples, and benign samples, researchers have been able to better understand and treat various conditions.

FFPE samples create standardized, quality-controlled results, whereas validation studies help researchers confirm experimental findings. Finally, benign tissue samples are crucial comparators in biomedical research, particularly in studying diseases such as cancer. These samples have helped treat, diagnose, and prevent diseases advancing the medical industry.

Today, clinical research is advancing rapidly, and the need for control tissue samples is growing daily. With Superior BioDiagnostics, you will have access to high-quality control tissue samples from various sites such as lung, brain, melanoma, breast, cervical, ovarian, and more to advance your research. If you’re looking for reliable control tissue samples, we’ve got you covered. Contact Superior BioDiagnostics today to order the tools for your next scientific breakthrough.